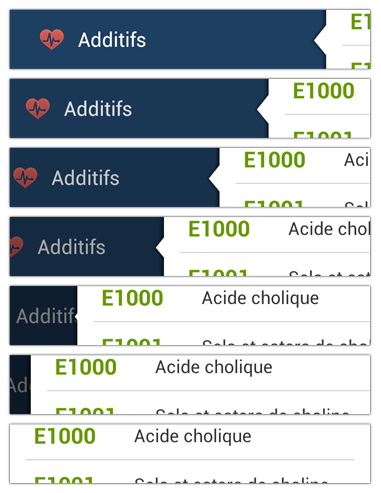
Thanks to the two previous articles of “The making of Prixing” series - see links below, we have learned all the technical details required to create a user-friendly, smooth and responsive fly-in app menu.
This post will concentrate on making the UI widget more polished and will give the answer to the puzzle I gave in the conclusion of the previous post: “How to use the sliding menu between Activities by-passing the default transition”. Of course, I highly suggest you read the previous articles of the series as they were both dedicated to the fly-in app menu.
Note: As usual, all figures in this article are available in high definition by simply clicking on it.
Enforcing perspective with drop shadows
As shown in the figure below, the fly-in app menu draws a drop shadow on the left of the host - ie the content of the screen - when being dragged or opened. The drop shadow enforces the perspective giving the user the impression the host slides on top of the menu. It is also a way to indicate the content is primary while the menu is secondary.
Drawing a drop shadow can be done in a number of ways. For instance you can add an ImageView with a “shadow” image as background that will always be laid out on the left of the host. This is obviously possible but it is pretty heavy in term of memory-consumption and layout/drawing performance. The current implementation of the Prixing’s ribbon menu uses a GradientDrawable drawn manually in dispatchDraw(Canvas). This latter method can be used in your custom Views whenever you want to draw something manually before or after the children were drawn. In our case this is obviously done after. You may also add a tiny optimization that prevents the shadow from being drawn when it is not visible ie when the drawer is closed. Here is what the RootView’s dispatchDraw(Canvas) looks like.
1 2 3 4 5 6 7 8 9 10 11 12 13 14 15 16 17 18 19 20 21 22 23 24 25 26 27 28 | |
The interesting things happen on top of the menuWidth computation/caching line (we will focus on the rest of the source code afterwards). When overriding the dispatchDraw(Canvas) just call super.dispatchDraw(Canvas) to draw the children Views and put your extra code after this call. As shown, the GradientDrawable is drawn manually on the Canvas which is translated to the appropriate position using Canvas#translate(int, int). Do not forget to initialize the bounds of your Drawable using Drawable#setBounds(int, int, int, int) or Drawable#setBounds(Rect) prior to using it or you will end up pulling your hair out, or even crying, because nothing happens. And believe me, I know that it hurts a lot!
“Abracadabra” or how to make the menu dis(appear)
In order to emphasize the fact the menu is appearing or disappearing it is usually a good idea to add some nice effects. The stock launcher app on my Galaxy Nexus for instance uses a nice zooming and fading animation to indicate the next page is being visible/invisible. When designing the RootView, I wanted the effect to be subtle and more in a two-dimensional space (I am not a huge fan of 3D effects). Pretty naturally we decided to make the menu appear/disappear using a dimming and parallax effect as shown below:
The dimming effect is done pretty basically using the previously introduced dispatchDraw(Canvas) method. It consists of drawing a translucent black rectangle entirely covering the menu. The transparency of the rectangle is computed on the fly with a fairly straightforward linear formula. Please note that the MAXIMUM_MENU_ALPHA_OVERLAY constant is not 255 but 170. Indeed, using a fully opaque rectangle when starting to open the menu would likely result in having users seeing a black background. This obviously doesn’t help knowing a menu is lying down there. Always having a translucent rectangle is way better from a user perspective.
1 2 3 4 5 6 7 8 9 10 | |
If you have carefully read the first article of the series, you probably know how to implement the parallax effect. Indeed, in the first article of this series we talked about a method used to quickly offset a View: offsetLeftAndRight(int). Thanks to this method, it is possible to offset the menu from a value depending on the current openness ratio:
1 2 3 4 5 6 7 8 9 | |
Indicating the selected application menu item
The Prixing application includes a lot of application features. Each of these features are normally represented by a single item in the application menu. In order to help the user understand where she is in the workflow, we decided to add an indicator on the current feature. In the application, the indicator is represented by a tiny arrow that keeps pointing to the feature as long as it is visible on screen. In the beginning, I thought about adding it to all of the itemviews composing the app menu and displaying it whenever necessary. Unfortunately, this would have caused several problems. First the drop shadow would have been drawn on top of the arrow, so we would have had some cases where the arrow is drawn next to the ActionBar which would be really ugly and it would have been impossible to make the arrow strech out/retract depending on the current openness of the menu. We really wanted to have a precise control over the arrow so we used a radically different approch: drawing the arrow manually in dispatchDraw(Canvas).
As attentive people may have noticed, the heavy work is done with the onDrawMenuArrow(Canvas, float) method. It first retrieves the bounds of the active View with getDrawing(Rect). At first, this method may look quite weird as its return type is void. getDrawing(Rect) is one of the rare methods in the Android framework returning the result directly in the passed argument. This is a trick that prevents creating several Rect instances for nothing. As a result, only a single instance can be created and reused over time. The main problem with the bounds returned by getDrawing(Rect) is that they are given in the active View’s parent coordinates space. Since we need to draw the arrow in the RootView’s dispatchDraw(Canvas) method, we need them in our coordinates space. Fortunately, the Android framework provides a utility method to offset the rectangle appropriately: offsetDescendantRectToMyCoords(View, Rect). The name of this method is rather long and mysterious, but it does the job! The resulting Rect lets us compute the position of the arrow on the Y-axis. The exact position of the arrow on the X-axis is determined depending on the given openness ratio - Prixing uses an AccelerateInterpolator to make the stretching out/retract effect less linear. Drawing the arrow on the Canvas is done pretty basically with a combination of Canvas#clipRect(int, int, int, int) and Canvas#drawBitmap(Bitmap, int, int, Paint)
Fly-in app menu usage 101
The RootView includes a nice feature that helps users to discover the hidden menu as well as the swipe capability. This feature called “menu hint” consists of animating the drawer as if it were bouncing the first time the user sees it. From my point of view, this is not the best option to teach the user the menu can be found below the host. Displaying the first Activity with an opened application menu which closes automatically after a given delay is probably better. We finally decided to go for the bouncing animation because we wanted the user to see the content of the application first. Now that you are familiar with Interpolators you can easily understand the PageHintInterpolator used by the RootView when the “menu hint” is enabled:
1 2 3 4 5 6 7 8 9 10 11 12 13 14 15 16 17 18 19 20 21 22 23 24 25 26 27 28 29 30 | |
Using the fly-in app menu between Activities
Let’s conclude this article with the answer to a puzzle I gave at the end of the preceeding one: How to seemlessly open/close the RootView between Activitys. Indeed, when I started working at Prixing, I discovered an enormous existing code base mainly based on tons of Activitys. We wanted to release a radically different version quite rapidly so we had to deal with all the existing Activitys, rather than switching them to Fragments. As a result, we started thinking about a way to make the transition between Activitys as natural as possible, and rapidly came up with a simple idea: Faking that the current Activity hasn’t changed simply by applying the same state to the opened Activity.
The Activity transition in the Prixing application relies on the exact same technique the Android framework uses to restore an Activity after it has been destroyed in low memory conditions. As a result, everytime a new Activity needs to be opened, we save the the interesting part of the current UI state using View#onSaveInstanceState()/View#saveHierarchyState(SparseArray<Parcelable>) and re-apply it to the newly created Activity thanks to View#onRestoreInstanceState(Parcelable)/View#restoreHierarchyState(SparseArray<Parcelable>)
I have to admit this is a pretty advanced technique but it works pretty great. Of course I haven’t given all the details here to make it work perfectly, but I hope you understand the main idea. Behind the scene we had to develop a custom ScrollView that saves its current scrolling state for the menu. Indeed, it is impossible to save the ListView state at a pixel level in Android 2.1, and the framework’s ScrollView doesn’t save its scrolling position1. Moreover, we implemented an OnLayoutListener-equivalent on our RootView to indicate that the menu close animation should be performed after the Activity has opened. Finally, since it is used on all Activitys, we worked hard on making the menu as light-weight as possible, flattening the View hierarchy and creating custom Views. For instance each feature in the menu is a made of a single AppMenuItemView which directly extends View and manages an icon, a title, a subtitle, an annotation and a divider.
Conclusion
That’s it! You now have all of the technical details to create stunning fly-in app menus. Some may say all of the tricks given in this post are just details but keep in mind details are what makes the difference. Details matter, so do not be afraid about spending a lot of time working on them. It will make your application better, more polished, more appreciated and hence more downloaded and used. I sincerely hope I have given all the tips and tricks required to reproduce all of the features that Prixing’s sliding menu has. If not, feel free to post a comment below and I will be pleased to answer your questions. I will surely continue revealing some Android UI development tricks we used while developing the third version of Prixing in future articles, so stay tuned!
Thanks to @franklinharper for reading drafts of this
- Some of you may wonder “Why the hell is this not already managed by the Android
ScrollView?”. That’s completely normal and here is the reason of it. Android is based on the idea that on a configuration change the content of a screen may change dramatically (for example the layout may be completely different). As a result, having aScrollViewin the portrait orientation doesn’t mean its height/content will be the same in the landscape orientation. Because of this it is not accurate to save and restore the current scrolling value by default.


